DIGITAL PHOTOGRAPHY AND IMAGING - EXERCISES
 28.08.18 - 22.10.18 (Week 1 - Week 9)
Maydeline (0335392)
Digital Photography & Imaging
Exercises
INSTRUCTIONS
LECTURES
Lecture 1 : Masking & Compositing
28.08.18 (Week 1)
This first week, we were given a brief introduction of the module outline by Mr Jeffrey. He gave us a brief sharing of what exercises we will be doing in the upcoming future.
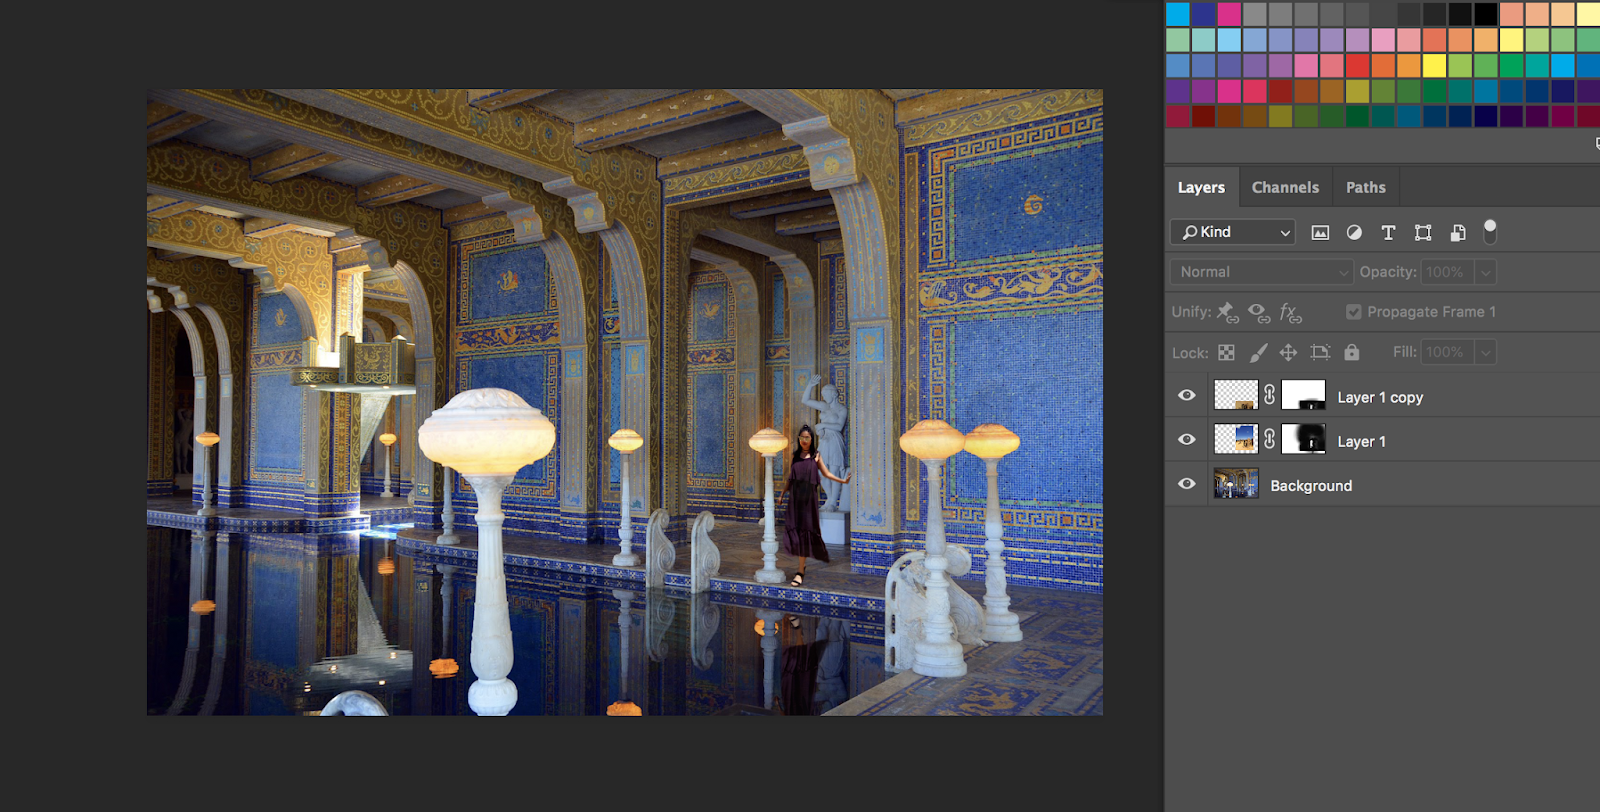
Firstly, we went on to learn about how to layer mask in Adobe Photoshop using the photo of Hearst Mansion. We had to choose a photo that has an indoor swimming pool so that we could make the reflection. Then, we had to layer mask a character for instance, we decided to do on Christopher Robins to make him as if he was in the photo.
 |
| Fig 1.1 Hearst Mansion |
 |
| Fig 1.2 Christopher Robin |
 |
| Fig 1.3 1st attempt of exercise |
I tried to do another attempt because I felt the first one wasn't that successful.
 |
| Fig 1.4 Hearst Mansion |
 |
| Fig 1.5 2nd attempt of exercise (Final) |
 |
| Fig 1.6 Screenshot of layers |
EXERCISE 1: Hearst Mansion
After learning the techniques and tools, our first exercise was to use our own photo and put it in the Hearst Mansion photo. We had to make it as realistic as possible as if we were in the Hearst Mansion. We were taught how to mask using shortcut keys and tools.
 |
| Fig 1.4 Hearst Mansion |
 |
| Fig 1.5 Image of myself |
 |
| Fig 1.6 Screenshot |
 |
| Fig 1.7 Final result of exercise |
LECTURE 2 : -
Week 2
We did not have any lecture as it was a public holiday.
LECTURE 3 : Masking, Matching colour, Transparency & Blending Modes
14.09.18 (Week 3)
For this lecture, Mr Jeffrey gave us a tutorial video on Youtube to learn about masking, matching the layer to the background colour, transparency and blending modes. We were given the files to use via Dropbox.
We had to mask the ghost house into the night scene background. Next, we matched the ghost house layer to the background colour. Then, we placed a female white ghost near the top of the house and had to make her transparent and blend into the night sky.
EXERCISE 2 : Ghost House
By following the tutorial video step by step, I learned how to photoshop these images together. First part of the tutorial was to photoshop the ghost house into the night background and match the colour of the background. This was done to make the house as if it was in the scene.
Lastly, we had to add the female ghost bride inside to make it look like the house is haunted by a female ghost at night.
 |
| Fig 2.1 House |
 |
| Fig 2.2 Background |
 |
| Fig 2.3 Female ghost |
 |
| Fig 2.4 Screenshot |
 |
Fig 2.5 Final Outcome
|
LECTURE 4 : Recolouring a black & white photo
24.09.18 Week 4
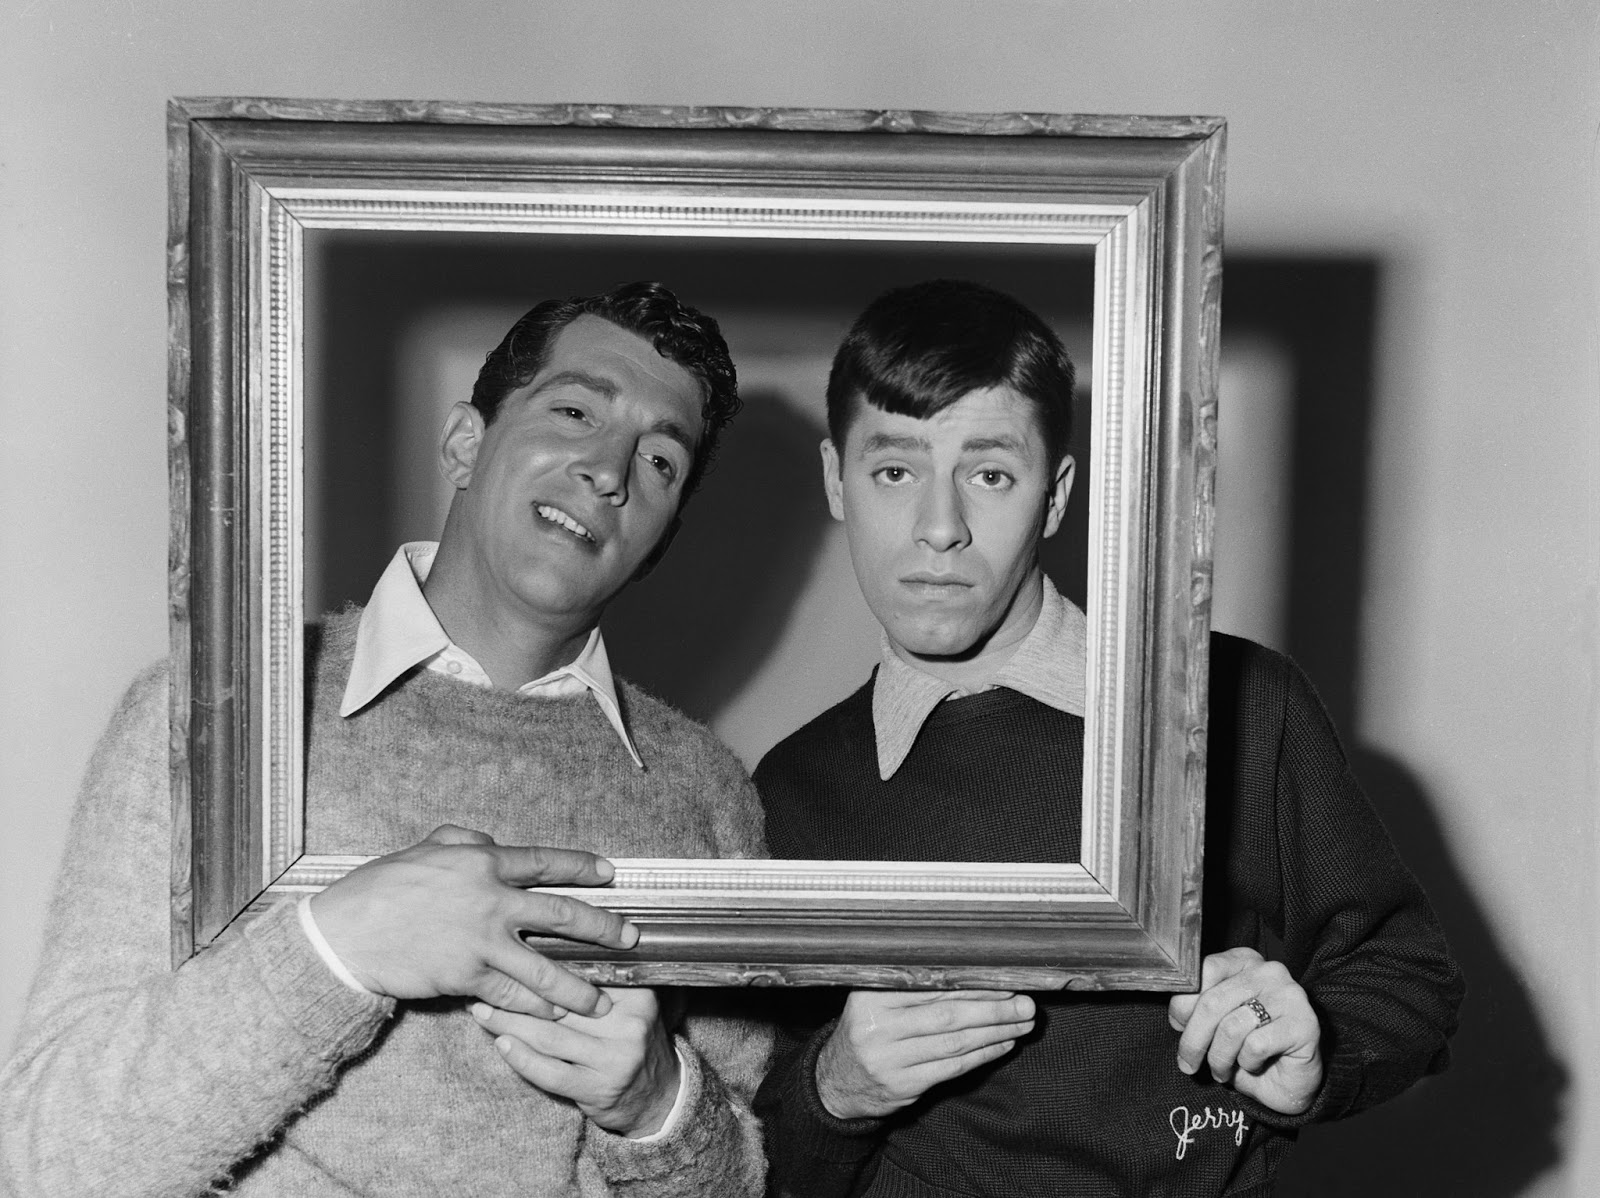
For this lecture, we learned how to recolour a black and white photo and we used a photo of an old man for this exercise. We had to add layers to create a colour for the skin, hair, eyes, lips, clothing and etc. We were given options to use any tools such as clipping mask, quick selection tool and lasso tool.
 |
Fig 3.1 Original photo
|
 |
| Fig 3.2 Final Result of exercise |
EXERCISE 3 : Recolouring exercise
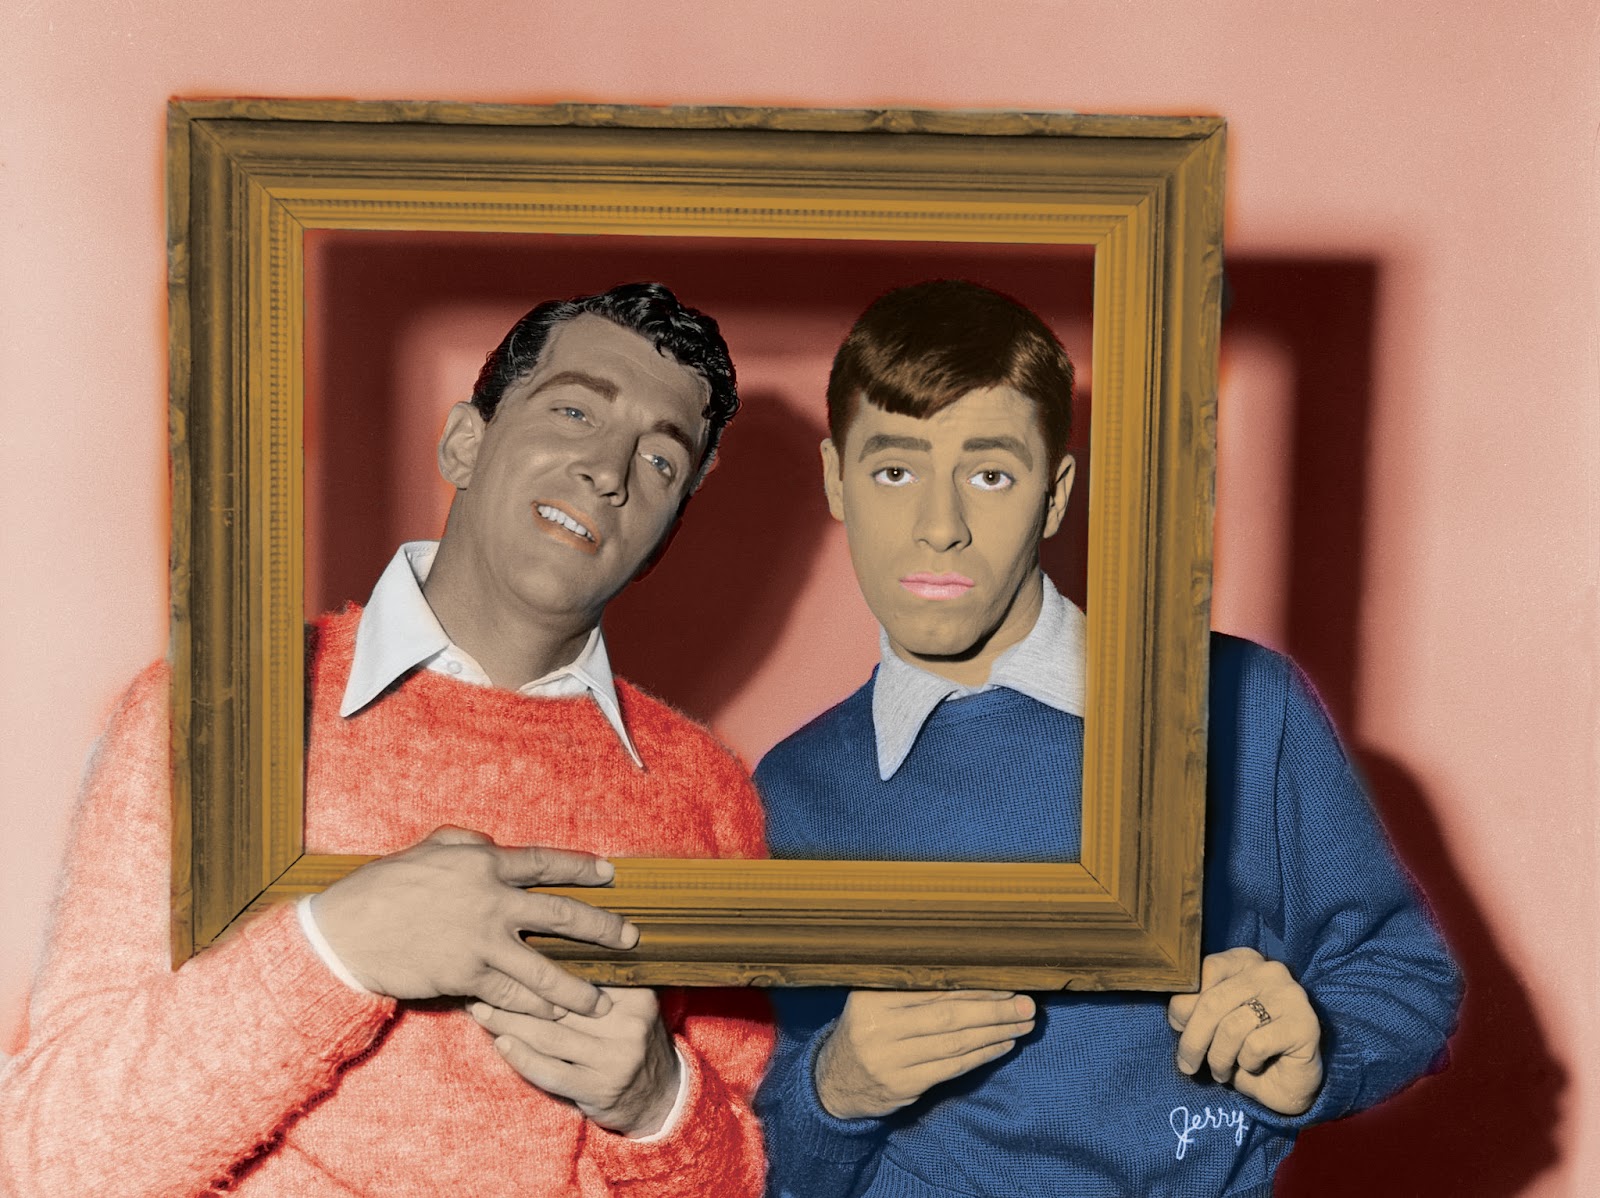
We were given an assignment to choose a portrait/landscape photo of people and the requirement was that the picture should be black and white. We also had to set the image size to be HDTV 1920 x 1080 pixels.
 |
| Fig 3.3 Original photo |
 |
| Fig 3.4 Screenshot of layers |
 |
Fig 3.5 Final outcome
|
LECTURE 5 : Clone Stamping Tool/ Healing Brush Tool/Add Textures
25.09.18 (Week 5)
For this week lecture, we need to input a flag into a cloth texture and made the flag to has a texture of a fabric.
 |
| Fig 4.1 Flag |
 |
Fig 4.2 Cloth texture
|
 |
| Fig 4.3 Final outcome of texture and flag |
 |
| Fig 4.4 Screenshot of process |
EXERCISE 4 : Add texture on the flag
After learning this technique, we used it on our exercise which is adding cloth texture on the flag.
 |
| Fig 4.5 Cloth texture |
 |
| Fig 4.6 Flag |
 |
| Fig 4.5 Screenshot of process |
 |
Fig 4.6 Final Outcome of exercise
|
LECTURE 6 : Changing Texture/Hybrid Animals
01.10.18 (Week 6)
For this exercise, we just need to use the old photo and add some snake skin texture on it.
 |
| Fig 5.1 Original photo |
 |
| Fig 5.2 Snake Skin Texture |
 |
Fig 5.3 Screenshot of process
|
 |
| Fig 5.4 Final Outcome |
EXERCISE 4 : Bird arms/Hybird animals
For this exercise, we have to interchange the characteristics of at least two animals. Mr Hafiz asked us to search about "Bird Arms" where we can add human hands/arms on the animals. Other choice is that we can change the skin color of the bird by using "fruit skin" as the texture. For this exercise, I used brush tool to help photoshop the arms smoothly to the animals.
 |
| Fig 6.1 Original photo of bird |
 |
| Fig 6.2 Kiwi texture |
 |
| Fig 6.3 Final outcome of kiwi textured bird |
 |
| Fig 6.4 Screenshot of process |
 |
| Fig 6.5 Flamingo |
 |
| Fig 6.6 Citrus |
 |
| Fig 6.7 Final Outcome of citrus skin bird |
 |
| Fig 6.8 Screenshot of process |
LECTURE 7 : Digital Surrealism
08.10.18 (Week 7)
This week, we learned how to recreate our own style of a well-known painting, Castle of Pyrenees. We used the techniques we learned from previous classes. This is the example that was given.
LECTURE 8 : Digital Surrealism
22.10.18 (Week 9)
This week, we are introduced how to edit in After Effects and we also had a photoshoot using the green screen.
 |
| Fig 9.1 Green Screen : A guy jumping |
 |
| Fig 9.2 Background |
 |
| Fig 9.2 After Effects practice |
 |
| Fig 9.3 Practice using puppet pin tool |


You can do everything in Photoshop in different ways. You should not always try one approach to accomplish something and stick with it, yet to investigate various methods of working so you can arrive at a point where you immediately know which technique is best. The photographic texture is a major component of the design. Learn More at: https://cutoutimagemedia.com/photographic-textures-into-masks/
ReplyDelete