ILLUSTRATION AND VISUAL NARRATIVE - PROJECT 1
ILLUSTRATION & VISUAL NARRATIVE - PROJECT 1
29.09.18 - 24.09.18 (Week 1 - Week 5)Maydeline (0335392)
Illustration & Visual Narrative
Project 1 - Character Design
INSTRUCTIONS
THE PROCESS OF CHARACTER DESIGN
27.08.18 (Week 1)
This week, we began with a brief introduction of the structure of the module and small introduction to Adobe Illustrator. We were introduced with the pen tool and tracing images with the pen tool. Our lecturer, Mr Hafiz, gave us a demonstration and tutorial of how to use the pen tool and then we were given the task for our first project which is the Vormator where we make characters using pen tool.
The Rules of the artwork were as follows:
- Scaling is allowed Proportionally but no free transform
- Not obliged to use all elements
- Rotating, flipping, and duplicating is allowed
- Can add, subtract, and group elements
- Use of color not restricted
- Allowed to use gradient
- No strokes, filters or effects
Firstly, we were given this exercise to track objects and shapes.
 |
| Fig 1.1 Vormator |
 |
| Fig 1.2 Tracing Vormator Result |
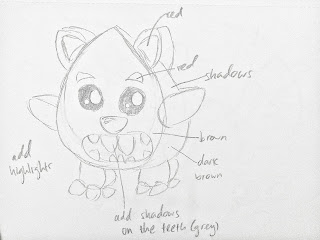
Next, we need to visualise and sketch our character.
 |
| Fig 1.3 Rough sketches |
 |
| Fig 1.4 Rough sketches |
03.09.18 (Week 2)
This week we started creating the silhouette.
 |
| Fig 1.5 Silhouette of character |
 |
| Fig 1.6 Silhouette of character |
08.09.18 (Week 3)
This week we added colours to our character and added some highlight and shadows.
 |
| Fig 1.7 Final result of character |
 |
| Fig 1.8 Final result of character with colour scheme |
21.09.18 (Week 4)
We also made the background for our Pokemon card and I decided to make the background orange and red with a volcanic mountain to show that the Pokemon's power is fire.
 |
| Fig 1.9 Idea and drawing for background |
 |
| Fig 1.10 Final result of background |
 |
| Fig 1.11 Screenshot of background |
24.09.18 (Week 5)
For this week, we went to Fabspace KL to print our characters on wood, acrylic or embroidery. I decided to laser cut the outline of my character first and then printed the colours onto the outline. After the laser cut was done, the character outline was moved to the UV printer where the colours will be printed on the wood piece.
 |
| Fig 1.12 Character |
 |
| Fig 1.13 Screenshot of character in ai |
We also went to make our Pokemon card where we had to include the Pokemon, the background, the card and the contents.
 |
| Fig 1.14 Final result of Pokemon. card |
 |
| Fig 1.15 Final Outcome of Pokemon card and Vormator |
 |
| Fig 1.16 Vormator final result( on the right ) |
Here is the attachment of my project 1 sketchbook:
Project 1 sketchbook


Comments
Post a Comment