ILLUSTRATION AND VISUAL NARRATIVE - EXERCISES
ILLUSTRATION & VISUAL NARRATIVE - EXERCISES
27.08.18 - 26.10.18 (Week 1-Week 9)
Maydeline (0335392)
Illustration & Visual Narrative
Exercises
Lecture 1 : Using the pen tool
27.08.18
First day class, we did a brief introduction to the module and software that we will be using for the upcoming exercises and projects. We were taught about the tools in Adobe Illustrator and one of them was the pen tool. We were told to do this exercise which was tracing the elements so we would get used to the pen tool.
 |
| Fig 1.1 Template of Shapes and Elements |
 |
| Fig 1.2 Exercise tracing using pen tool |
 |
| Fig 1.3 Rough sketches |
 |
| Fig 1.4 Rough sketches |
 |
| Fig 1.5 Silhouette |
Lecture 2 : -
03.09.18
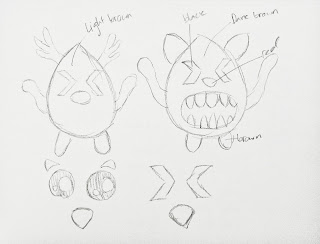
We did not have any lecture this week and continued our character design. Mr Hafiz also thought us how to add shadows and highlights for our characters.
 |
| Fig 2.1 Shadows & Highlights |
Lecture 3 : Shape Builder and Gradient
14.09.18
This week we learned how to combine our shapes by using the pathfinder. This is called shape builder (Shift + M) by selecting and dragging the shapes that you want to combine. In addition, we also learned how to use the gradient tool(G). We were also informed to add colour scheme in our character design.
 |
| Fig 3.1 Screenshot of character |
 |
| Fig 3.2 Colour Scheme |
Lecture 4 : Paintbrush
21.09.18
This week Mr Kannan taught us how to use paint brushes in the Photoshop software. We learned how to use the Paintbrush tool (B), Blob Brush tool (Shift + B), Direct Selection tool (A) and adding texture,
Paint brush tool
Paint brush tool is very effective especially in drawing in our computer using a Wacom tablet. We can really draw and control the hardness and softness of the brush and of course the size as well. Furthermore, we found out that there were lots of types of brushes that we could use/prefer.
Blob brush tool
Blob brush tool is used for adding colours to shapes/drawings.
Steps:
- Draw a character/shape using the blob brush tool
- Choose a colour from the swatches
- Trace the outline of the shape
- Use the Direct Selection tool (A) and click one of the inner pain handles
- Delete
- Repeat the steps until it is fully coloured.
 |
| Fig 4.1 Practice using brush |
Direct Selection tool
Steps:
- Select the shape
- Adjust the shape by using Shift + arrow keys / Direct Selection tool
- Use ruler tool (View - Ruler) (Ctrl + R)
 |
| Fig 4.2 Ruler tool |
Texture
Steps:
- Find a texture
- Copy and paste the image of texture and place beside the character
- Windows - Transparency
- Click on the texture image and copy
- Click on the shape and make mask
- Paste the image on Mask area
 |
| Fig 4.3 Adding texture to shapes |
Lecture 5 : Chiaruscuro Pear
28.09.18
This week's exercise was to create a pear with colours, shadows and highlights.
Steps: Us
- Find a picture of a pear
- Draw the outline using a pen tool.
- Reflect the traced outline (O) and place the arrow on the centre point of the outline. Hold ALT key and clock and drag.
- Use Pathfinder to merge the outlines
- Trace the shadows and control the ocapity
- Use knife tool to cut a pattern on the pear
- Choose any color for the pear
- Separate the parts.
 |
| Fig 5.1 Original image (Pear) |
 |
| Fig 5.2 Pear Illustration |
 |
| Fig 5.3 Screenshot of process |
 |
| Fig 5.4 Pear with 2 different colours illustration |
 |
| Fig 5.5 Screenshot with layers |
 |
| Fig 5.6 Final Outcome |
 |
| Fig 5.7 Screenshot |
We could also do this exercise by using a person's silhouette.
 |
| Fig 5.8 Original image (People) |
 |
| Fig 5.9 Final Outcome |
 |
| Fig 5.10 Screenshot with layers |
Lecture 6 : Panel to Panel Transitions
01.10.18
This exercise was related to our project of making a comic so that we can use these transitions in drawing our comic.
Action To Action
Moment To Moment
Subject To Subject
 |
| Fig 6.1 Moment To Moment, Action To Action, Subject To Subject examples |
Aspect To Aspect
Scene To Scene
 |
| Fig 6.2 Scene To Scene, Aspect To Aspect, Non Sequitur Examples |
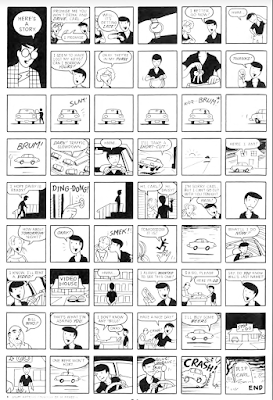
After we were given the examples, we had to identify the 5 transitions in the comic that was given.
 |
| Fig 6.3 Comic that is given |
 |
| Fig 6.4 Final Outcome of transition exercise |
Lecture 7 : Shading a ball
19.10.18
We were taught how to shade the highlight and shadow of a ball using coloured and black and white brushes.
Steps:
- Make a ball using the eclipse tool
- Use the Wacom tool and choose the type of brush and reduce the opacity
- Color it
 |
| Fig 7.1 Shading ball (black & white) |
 |
| Fig 7.2 Adding galaxy texture to ball |
 |
| Fig 7.3 Screenshot with layers |
 |
| Fig 7.4 Screenshot with layers |
Lecture 8 : Perspective drawing & strokes
26.20.18
This week we learned how to draw vertical and horizontal strokes using the tablet pen. We learned how to create mountains and also how to construct guidelines, both done in Photoshop.


Comments
Post a Comment